Setup Guide
Setting up the Flyy SDK in your Android app
Initialize SDK
The following guide provides steps to initialize the Flyy SDK for your Android application. Please follow all the steps below carefully.
Note
It is necessary to complete your app's Firebase setup before integrating the Flyy SDK.
Add Dependencies
Add Auth Token
To access Flyy's private JitPack library, add this line in your project's gradle.properties file (your_project/gradle.properties):
authToken=jp_toc9ldlr81jv1ncq2gp2e6q1sg
Add JitPack Repository
In your project level build.gradle file (your_project/build.gradle), add the maven repository inside the allprojects closure:
buildscript {
  ...
}

allprojects {
   repositories {
       ...
       jcenter() //Keep the jcenter repository
       // Add the bellow lines
       maven {
           url 'http://jitpack.io'
           credentials { username authToken }
       }
   }
}
Gradle 7.0+
If the
allprojectsclosure does not exist, in your project's settings.gradle file (your_project/settings.gradle), add the maven repository:dependencyResolutionManagement { repositoriesMode.set(RepositoriesMode.FAIL_ON_PROJECT_REPOS) repositories { ... jcenter() // Keep the jcenter repository maven { url 'http://jitpack.io' credentials { username authToken } } } }
Add the FLYY SDK dependency
In your module level build.gradle, your_project/app/build.gradle file.
dependencies {
   ...
   api 'com.github.roid-software:flyy-sdk:1.4.55.44'
}
Next,
Sync your project with Gradle files by clicking Sync Now.
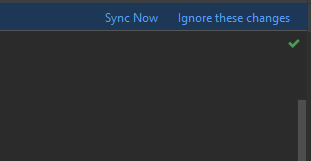
Sync should succeed, at this point
Pair SDK with Dashboard
Register Package Name
Open your Flyy Dashboard and go to Settings > Connect SDK and register a Package Name.
Note
- The package name need to be same as your Android app's application id if using the refer and earn.
- Package name once registered cannot be edited.
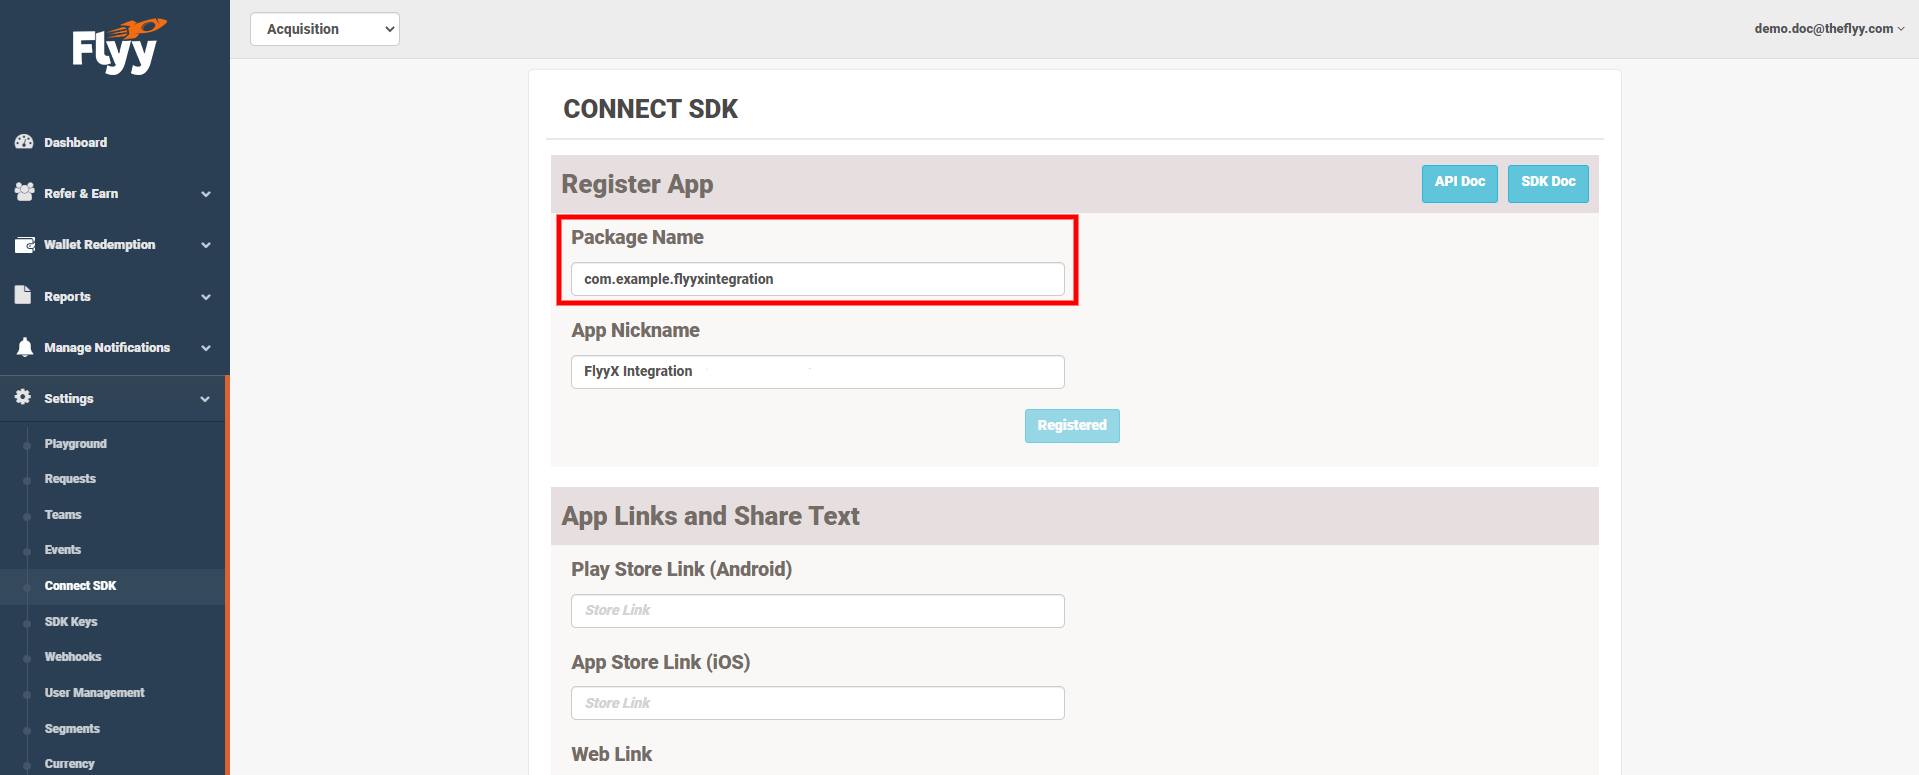
Set Package Name
In your app's Application class or your main entry point, call setPackageName.
Flyy.setPackageName("<package_name_same_as_registered_in_flyy_dashboard>");
Flyy.setPackageName("<package_name_same_as_registered_in_flyy_dashboard>")
Initialize SDK
The final step of initialization is to call the init and the setUser method.
Initialize with a Partner ID
Initialize the SDK in your app's Application class or main entry point of the app. For integration purposes, set the environment as Flyy.STAGE.
//For Staging Environment
Flyy.init(getApplicationContext(), "{partner_id}", Flyy.STAGE);

//For Production Environment
Flyy.init(getApplicationContext(), "{partner_id}", Flyy.PRODUCTION);
//For Staging Environment
Flyy.init(applicationContext, "{partner_id}", Flyy.STAGE)

//For Production Environment
Flyy.init(applicationContext, "{partner_id}", Flyy.PRODUCTION)
You can find your Partner ID in the Flyy Dashboard at Settings > SDK Keys.
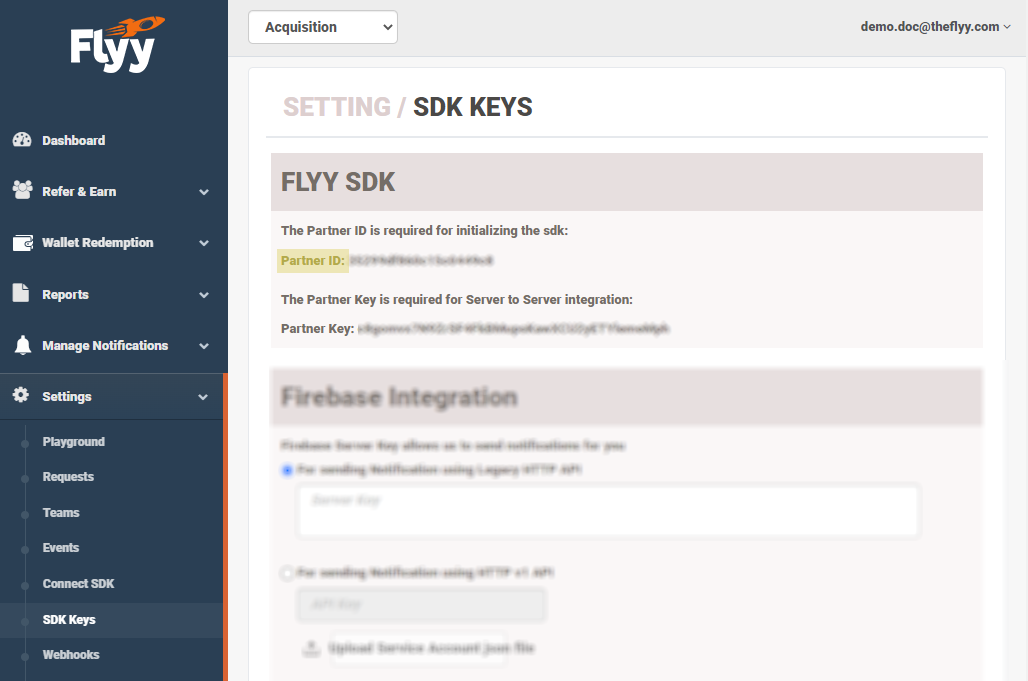
Set User ID
To complete the initialization process, call the setUser method. setUser must be called every time a user opens the app.
//Set User ID. During Login and every subsequent app open.
Flyy.setUser("unique_id");
//Set User ID. During Login and every subsequent app open.
Flyy.setUser("unique_id")
Note
unique_id can be any string that will be shown in reports. This must be unique and cannot be changed for any User later on.
To check whether the initialization was successful, open your Staging dashboard and go to Reports > Users. In case of successful integration, you should immediately see the newly created user in the Users Report. With that, this completes the SDK Initialization Process.
Add Flyy Widget (Optional)
The Flyy Widget is an XML View that provides a ready-to-use entry point leading to Flyy SDK's Primary Screens.
Adding the Flyy Widget is not required to complete the initialization process, but is recommended because it will allow you to test the SDK features readily.
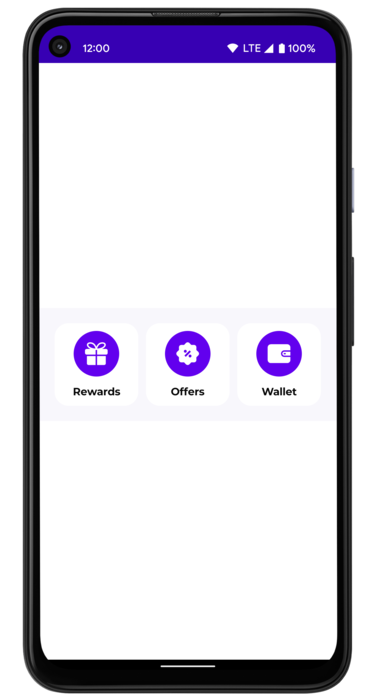
To add the Flyy Widget, just add the following XML code to your layout.
<theflyy.com.flyy.customview.FlyyWidget
    android:layout_width="match_parent"
    android:layout_height="wrap_content"
    android:fitsSystemWindows="true" />
The Flyy Widget can also be customized to match your application's style and theme. To learn more, visit Flyy Widget's documentation page.
Manage Notifications
Flyy SDK takes advantage of Firebase's Cloud Messaging (FCM) to display Push Notifications and show in-app popups such as scratch cards. Therefore, it is necessary to set up FCM in your Android app. To set up FCM in your app, you can follow its official guide.
Add FCM Server Key
To enable Flyy to send FCM notifications to your app perform either of the two following steps.
Legacy HTTP API
- Copy the Server Key from Project Settings > Cloud Messaging in your Firebase console.
- Then paste it into your Flyy dashboard at Settings > SDK Keys.
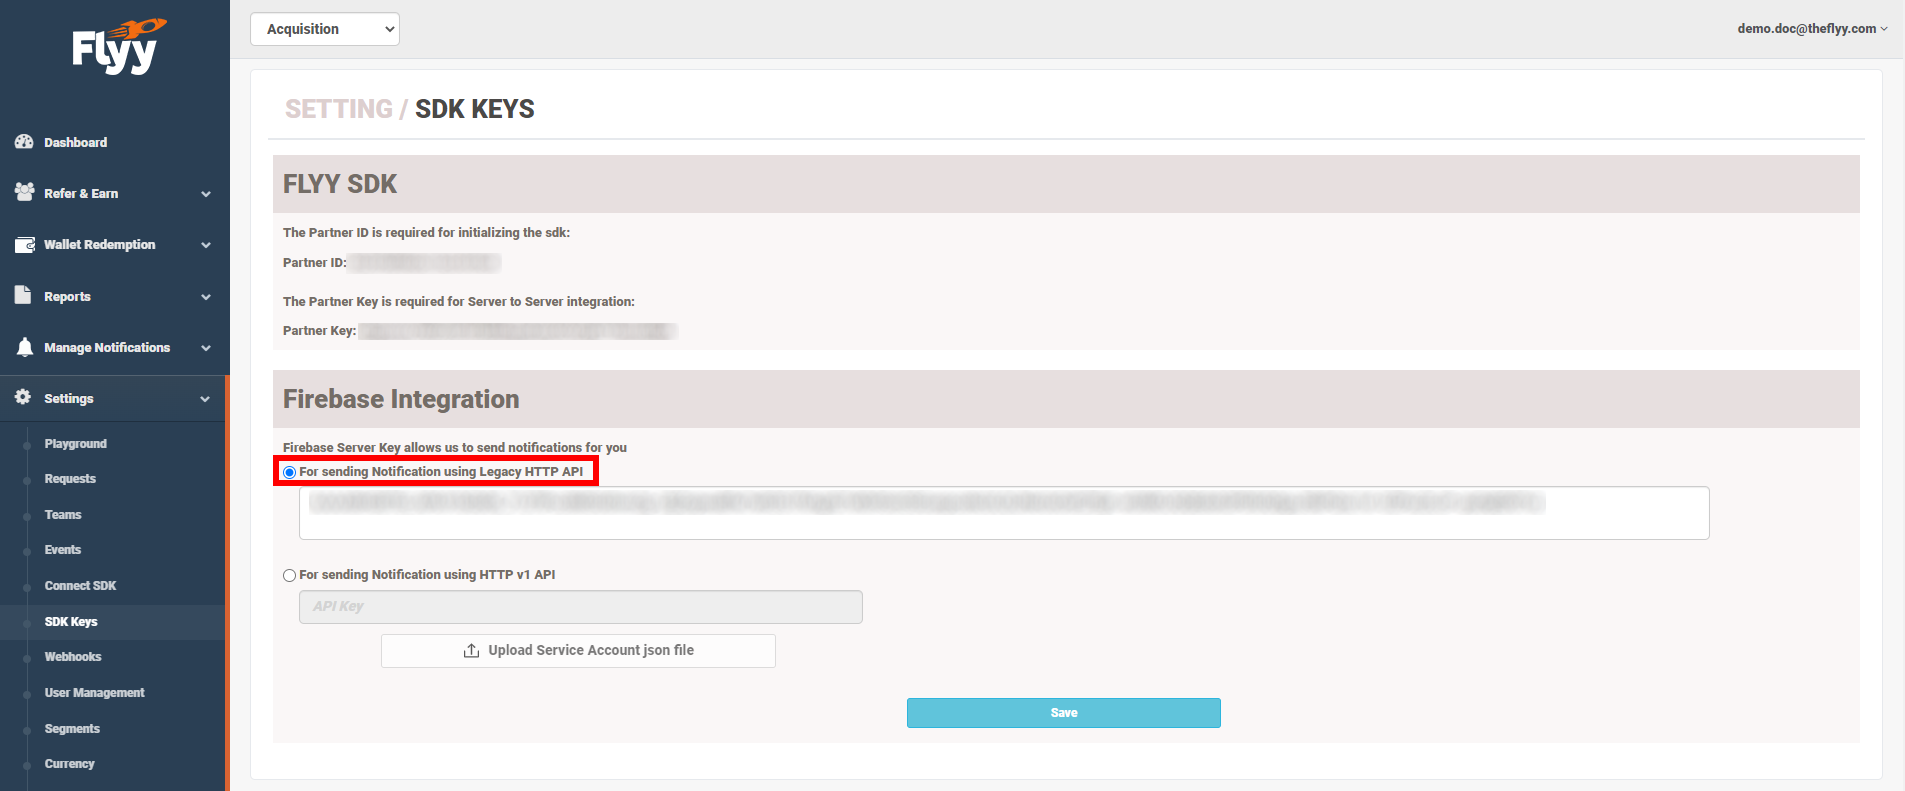
HTTP v1 API
To use the newer API, the API requests must be authenticated using a Web API Key and a JSON Service Account Private Key. The below steps will guide you to get the API Key and JSON Key.
-
Provide API Key
-
Copy Web API Key from Project Settings > General in your Firebase console.
If this key is not yet generated, just perform the following two steps. Open Authentication and click Get Started. Go back to Project Settings > General to find the Web API Key generated. -
Paste the Web API Key in the API Key text box in your Flyy Dashboard at Settings > SDK Keys.
-
-
Upload JSON Key
- Generate new private key from Project Settings > Service accounts.
- Then, in your Flyy Dashboard, click Upload Service Account json file to upload the downloaded JSON file.
Click Save.
Modify FirebaseMessagingService class
After you've set up FCM, add the following lines to your FirebaseMessagingService class.
public class FCMService extends FirebaseMessagingService {

    @Override
    public void onMessageReceived(@NonNull RemoteMessage remoteMessage) {
        super.onMessageReceived(remoteMessage);
        //Add the following lines
        Map<String, String> data = remoteMessage.getData();
        if (data.containsKey("notification_source")
                && data.get("notification_source").equalsIgnoreCase("flyy_sdk")) {
            FlyyNotificationHandler.handleNotification(getApplicationContext(), remoteMessage, null, null);
        }
    }


    @Override
    public void onNewToken(@NonNull String token) {
        super.onNewToken(token);
    }
}
class FCMService : FirebaseMessagingService() {

    override fun onMessageReceived(remoteMessage: RemoteMessage) {
        super.onMessageReceived(remoteMessage)
        //Add the following lines
        val data = remoteMessage.data
        if (data.containsKey("notification_source")
            && data["notification_source"].equals("flyy_sdk", ignoreCase = true)
        ) {
            FlyyNotificationHandler.handleNotification(
                applicationContext,
                remoteMessage,
                null,
                null
            )
        }
    }

    override fun onNewToken(token: String) {
        super.onNewToken(token)
    }
}
The Flyy SDK will now handle all notifications from Flyy.
Prepare for Release
If you are using ProGuard to obfuscate your code, then add the following rules to your proguard-rules.pro file (your_project/proguard-rules.pro):
#Retrofit does reflection on generic parameters. InnerClasses is required to use Signatureand
# EnclosingMethod is required to use InnerClasses.
-keepattributes Signature, InnerClasses, EnclosingMethod
# Retrofit does reflection on method and parameter annotations.
-keepattributes RuntimeVisibleAnnotations, RuntimeVisibleParameterAnnotations
#Retain service method parameters when optimizing.
-keepclassmembers,allowshrinking,allowobfuscation interface * { @retrofit2.http.* <methods>;}
# Ignore annotation used for build tooling.
-dontwarn org.codehaus.mojo.animal_sniffer.IgnoreJRERequirement
# Ignore JSR 305 annotations for embedding nullability information.
-dontwarn javax.annotation.**
# Guarded by a NoClassDefFoundError try/catch and only used when on the classpath.
-dontwarn kotlin.Unit
# Top-level functions that can only be used by Kotlin.
-dontwarn retrofit2.KotlinExtensions
-dontwarn retrofit2.KotlinExtensions$*
# With R8 full mode, it sees no subtypes of Retrofit interfaces since they arecreated withaProxy
# and replaces all potential values with null. Explicitly keeping the interfacesprevents this.
-if interface * { @retrofit2.http.* <methods>; }
-keep,allowobfuscation interface <1>
-keep class retrofit2.** { *; }
-keep public class theflyy.com.flyy.** {*;}
Updated about 1 year ago
Take a step-by-step guide on how to create and redeem your first Offer
