Create your First Campaign
Create and Implement your First Campaign in your Android App
This guide is aimed to help onboard Android Developers who are new to using the Flyy SDK. You'll be learning how to:
- Create a new Campaign from the Flyy dashboard. The goal of this campaign will be to reward users whenever they make a purchase.
- Implement the offer in the android app to reward users when they tap the Checkout Button.
- View how the app performs from a user's perspective.
- Track claimed offers by viewing Reports.
Prerequisites
- It is required that you've already followed and completed all steps in the Setup Guide.
Create a Campaign from the Dashboard
Set up a Challenges campaign from your staging dashboard by following these instructions. When done, come back and implement this offer in the Android app.
Implement Offer in the Android App
Download the demo project for the sample app from this GitHub repository. The demo project just contains the basic setup and an extra activity to simplify this guide. Before we can run this code, we need to configure the project to connect it with the Flyy dashboard as well as your Firebase project.
Configure the Demo Project
Config Step 1: Set Package Name
In MainActivity.java, provide the Package Name copied from your Flyy dashboard at Settings > Connect SDK
public class MainActivity extends AppCompatActivity {

    @Override
    protected void onCreate(Bundle savedInstanceState) {
        ...

        //TODO Config 1: Paste Package name from "Settings > Connect SDK" in Dashboard.
        Flyy.setPackageName("package_name");
        ...
    }

    ...
}
class MainActivity : AppCompatActivity() {
    override fun onCreate(savedInstanceState: Bundle?) {
        ...

        //TODO Config 1: Paste Package name from "Settings > Connect SDK" in Dashboard.
        Flyy.setPackageName("package_name")
        ...
    }

    ...
}
Config Step 2: Set Partner ID
Copy Partner ID from your Flyy dashboard at Settings > SDK Keys and paste it in the init method.
//TODO Config 2: Paste Partner Id from "Settings > SDK Keys" in Dashboard.
Flyy.init(getApplicationContext(), "partner_id", Flyy.STAGE);
//TODO Config 2: Paste Partner Id from "Settings > SDK Keys" in Dashboard.
Flyy.init(applicationContext, "partner_id", Flyy.STAGE)
Config Step 3: Download google-services.json
From the same Firebase Project used to setup Firebase Messaging to Manage Notification, download the google-services.json file from your project's General Settings and place it in your FlyyBaseCode/app/ directory.
Config Step 4: Modify application Id
In the module level build.gradle file FlyyBaseCode/app/build.gradle change the applicationId so that it matches with your Firebase project's Package Name.
android {
    ...

    defaultConfig {
        //TODO Config 4: Modify applicationId if required to match the Package Name provided to Firebase
        applicationId "com.example.flyybasecode"
      	...
    }

    ...
}
Run App.
Go to Reports > Users in your Flyy Dashboard. You should see a new user test_user_1.

View Offers
Flyy SDK has an Offers Activity wherein a user can see all the Offers currently available to them. Let us view what the user sees when they open the Offers Activity.
In the offersButton.setOnClickListener method add the following line to open the Offers Activity.
offersButton.setOnClickListener(
        v -> {
            //TODO Step 1: Navigate to Offers Activity
            Flyy.navigateToOffersActivity(this);
        }
);
offersButton.setOnClickListener { v: View? ->
    //TODO Step 1: Navigate to Offers Activity
    Flyy.navigateToOffersActivity(this)
}
Run App and Tap on the Offers button to view the following screen.
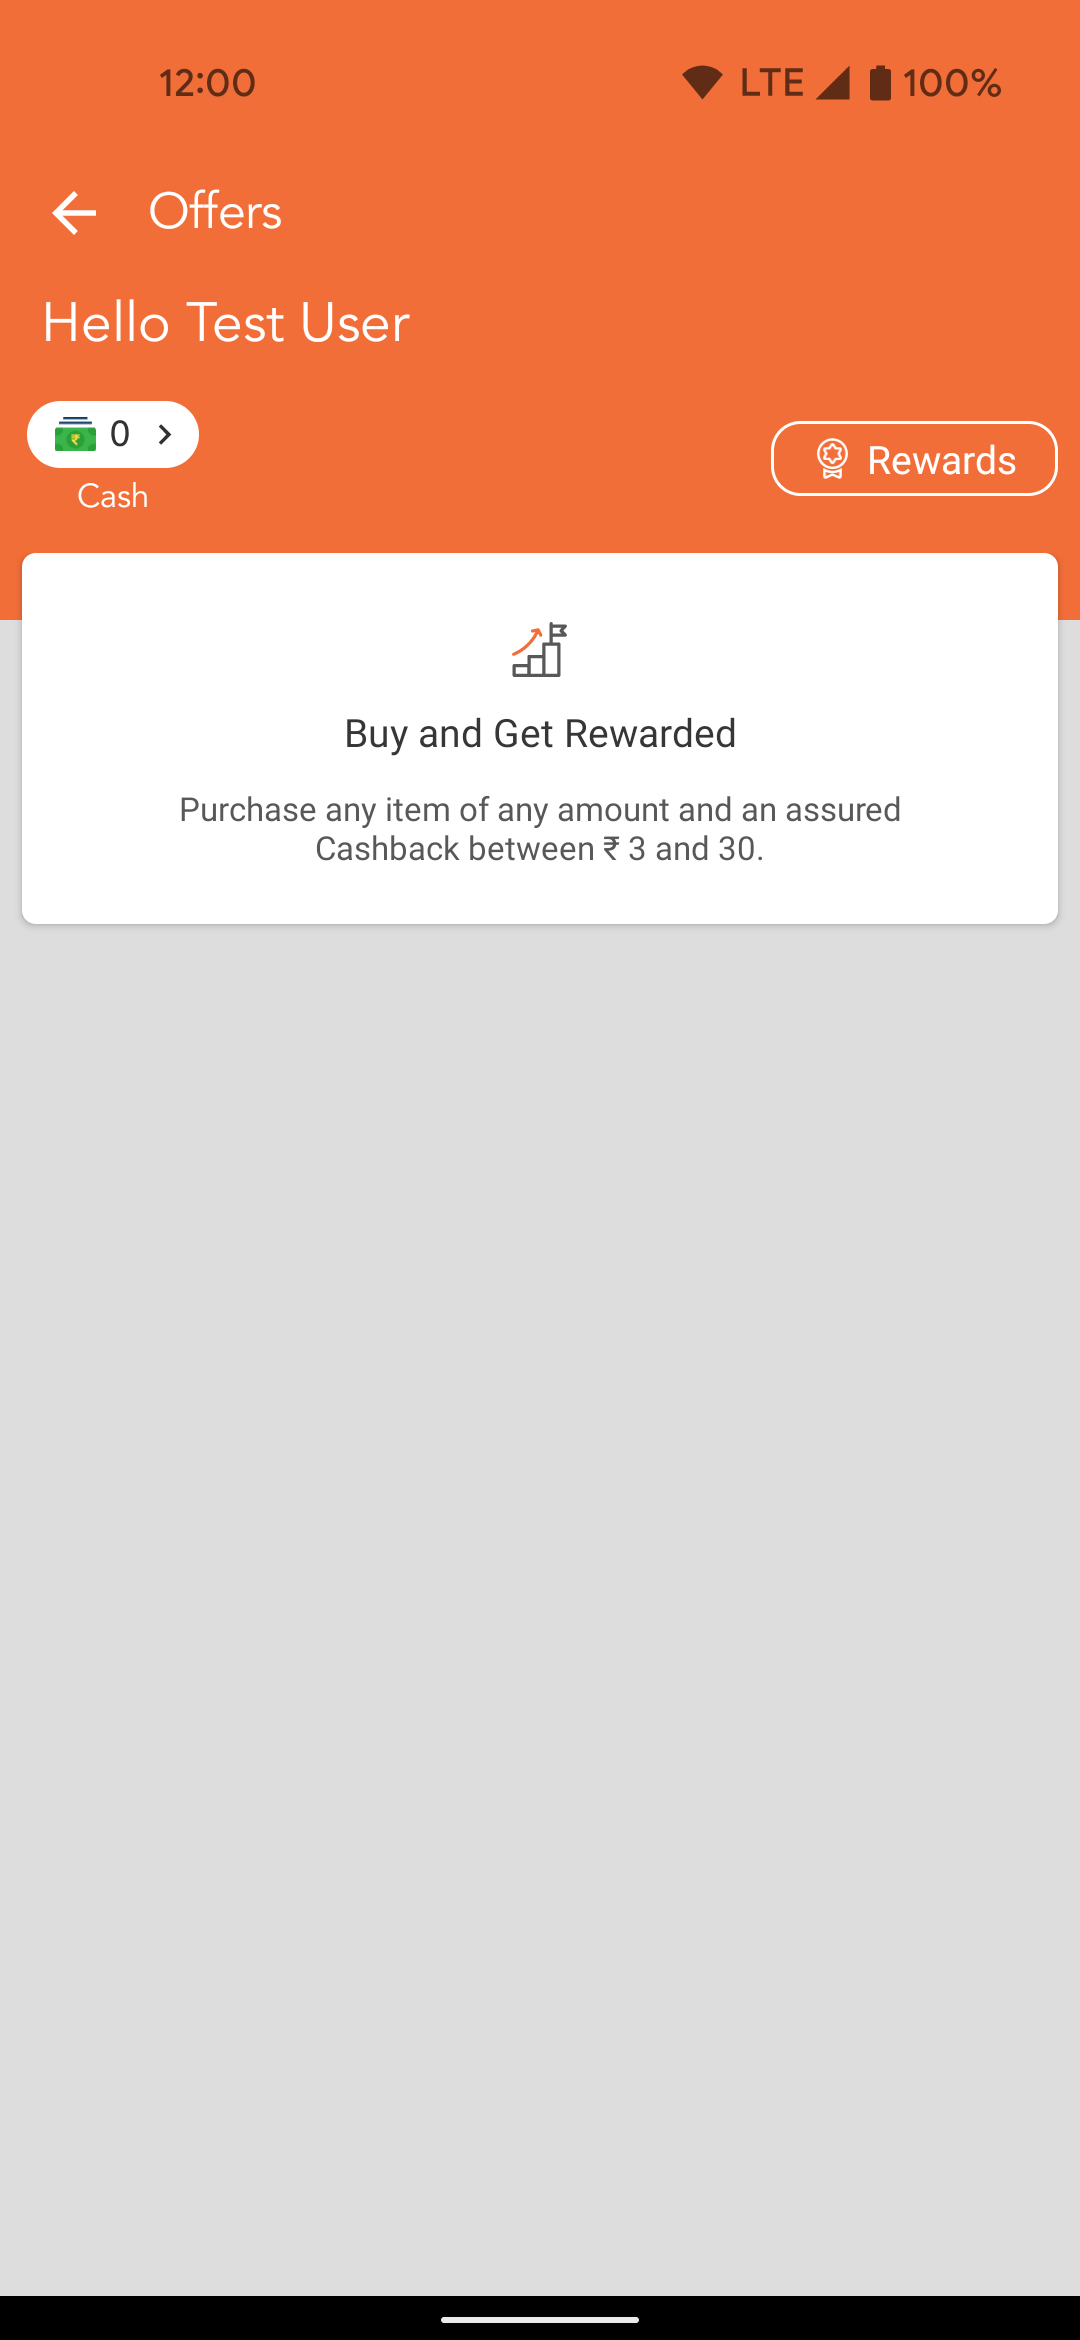
Flyy provides multiple ways to customize the look and feel of every campaign. Enabling Show Banner under Content & Styling will replace the above title and description with the provided banner image.
Navigate back to the MainActivity.
Send Event on Checkout
There is just one final step remaining and that is sending the purchase event at Checkout.
In Android Studio, open CartActivity.java and add the following line to the checkoutButton.setOnClickListener method.
checkoutButton.setOnClickListener(
        v -> {
            //TODO Step 2: Send purchase Event
            Flyy.sendEvent("purchase", "true");
        }
);
checkoutButton.setOnClickListener { v: View? ->
    //TODO Step 2: Send purchase Event
    Flyy.sendEvent("purchase", "true")
}
The sendEvent method takes in two arguments: the first is the Event Key, and the second is a JSON object to send conditions in key-value pairs.
Since we don't have any conditions, the second argument is just a placeholder and can be any text besides "true" as well.
Sending User Event with API
The
sendEventmethod should only be used for testing on the Staging environment.
For production, use the Sending User Event API call from your backend instead. AllsendEventevents generating from the front-end are ignored by Flyy's reward system.
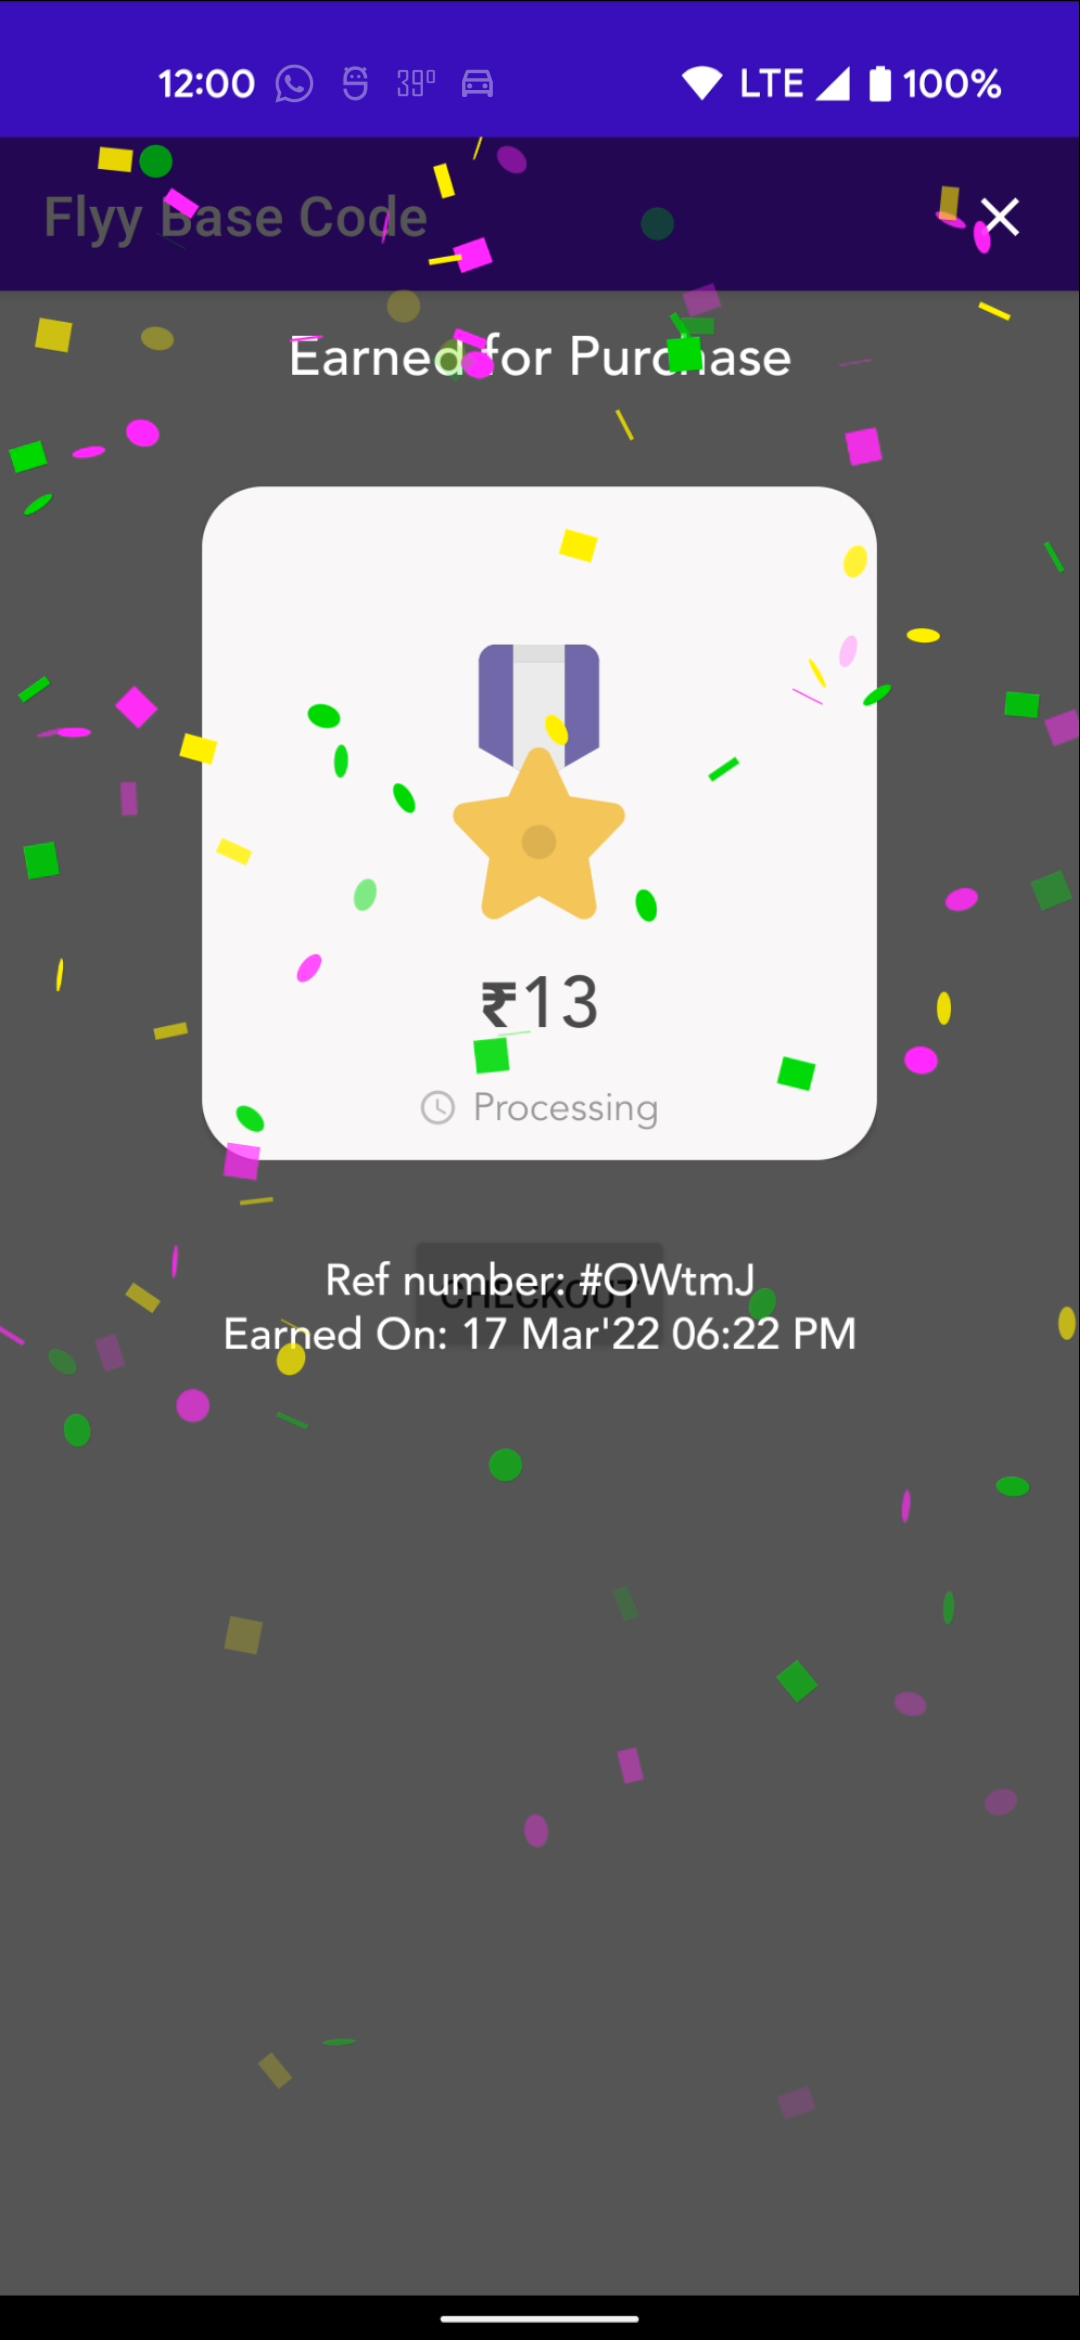
Now, run the app and perform the following actions.
Open Cart Activity and tap Checkout. A popup and a push notification will appear on the screen after a moment.
Track Campaign
View Event Status
Back in the Flyy Dashboard, go to Settings > Events. the Connection Status for the purchase event should now be Connected.

Updated about 4 years ago